
Builders will often ask how to finish a structure so that it is ready for thatch. I thought it would be easier to share some photos of a perfect roof to thatch onto, rather than explain it verbally, so here goes.
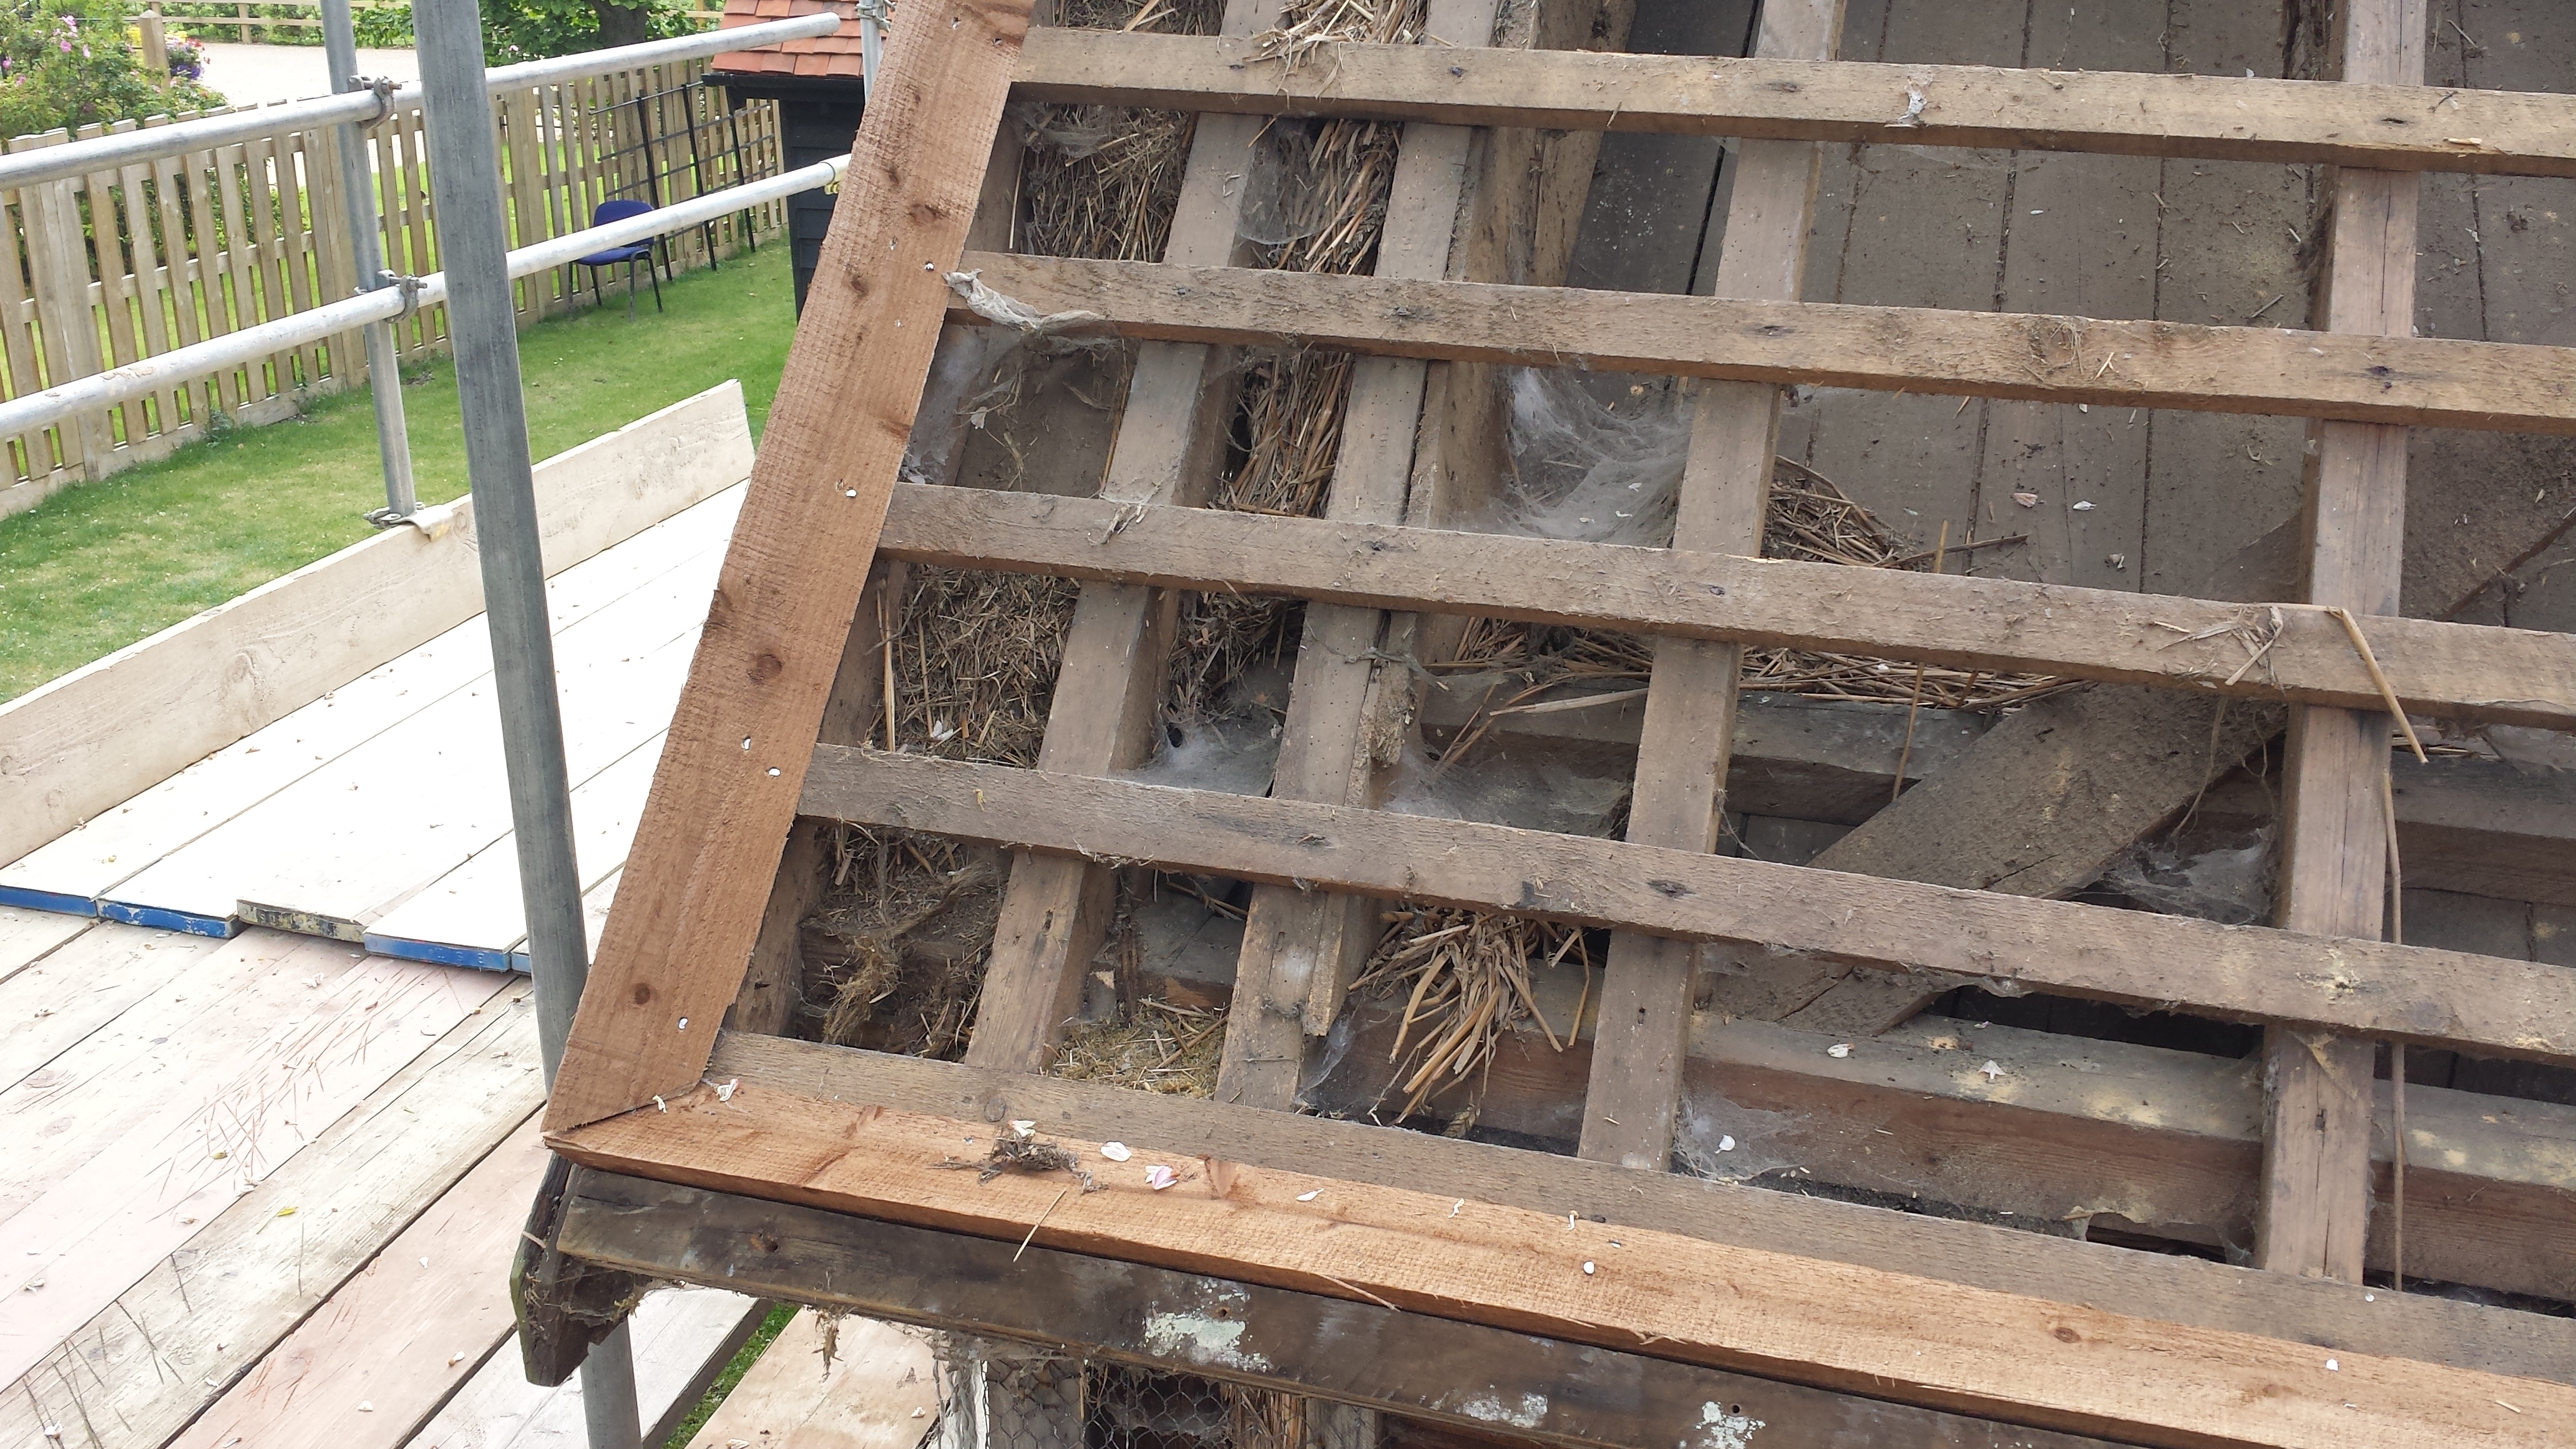
Here we see the corner. There is an aris rail on the eaves and gable, this gives a little kick to the material, which helps with the tension when fixing to the roof. The battens are spaced at 9 inches apart, which is ideal for straw. For reed, battens can be 12 inches apart, but it doesn’t matter if they are closer.

This shows the eave of water reed being formed. You can see how the aris rail is doing its job. If it wasn’t there, the reed is much more likley to slip off the roof as there would be no kick.

On the top, a ridge board is needed. This one is perfect as it is slightly raised. This doesn’t have to be the case, as the thatcher can raise the level using rolls made from straw or reed, but by doing it this way it saves the thatcher a little bit of work, and gives a slighlty raised structure to get a screw or spike into when thatching the top course.
If you are adding fire protection to the building, then this photo will help. The fire board or membrane goes on top of the rafters. On top of this comes vertical counter battens. These go directly on top of the rafters, so the thatcher knows where the rafters are so he can fix to them when the thatch goes on. On top of the counter battens are the horizontal battens. This allows for an air gap under the thatch, letting it breathe.
